


A while back I started playing with my Janome Walking Foot (also known as an Even Feed Foot). I’m loving this foot and using it for a load of general sewing. It is more traditionally a quilting foot but awesome for denim, minkee and any multi-layer project.
The foot has feed dogs for the upper layer of your fabric that work in unison with the feed dogs of your machine on the lower layer. This pretty much guarantees that you won’t let you fabrics slip or shift or pucker your fabric and helps ensure straight sewing. Alright, not guaranteed when you look away at your 1 year old when he calls and you are sewing a curve... but almost ;)
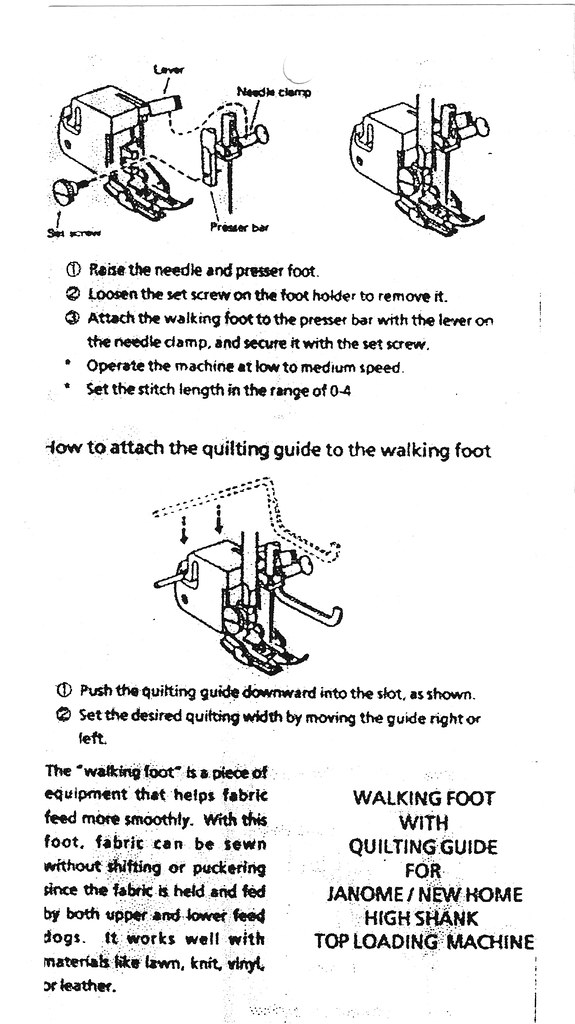
One thing I do remember is that the week I got the foot, I was pretty nervous about attaching it to my new baby – the Janome DC4030 (or otherwise known as the less crazy looking, more pink version of the Threadbanger TB-30 in the U.S). One of the only places I could find info when I was stuck was at Liesl’s blog Hoppo Bumpo – thanks L. I could also find replacement Janome instructions [small poor quality sketches] here.
Here goes, I have a little tutorial to share that might help put 2 and 2 together and give some confidence for a properly installed well functioning Walking Foot.
Installing your Janome Walking Foot:
Step 1. Take your starting positions!

Step 2. Get set.... pause a moment to notice this big bolt, a key component in changing from regular presser feet to your Walking Foot. Press the red release button at rear of foot to release and then remove any presser feet currently fitted (this was my ¼” foot w/ flange guide [lovely!]).


Step 3. Go! Loosen off the big bolt with supplied flat head screwdriver. I then find it easier to do the last few turns by hand so that the bolt ends up in my hands rather than falling on the table with potential to roll away. You are going to need this in a second, so keep handy.


Step 4. This is the result you are after. Naked! Note the little hole as you will need to line this up with your walking foot parts.

Step 5. Slide the walking foot to be hugging the naked pole, you need to have nimble fingers and lift the white bar over your needle tightening screw. This is layperson terms to make things easier and very technical speak ;)


Step 6. Use the nimble fingers you found in the previous step to place the bolt back into the empty hole, lining up the metal bars either side of the hole/bolt. Then tighten up the last few turns with the screwdriver for a nice firm fit and you are finished. Go make happy stitches!


No comments:
Post a Comment